Electric gate repair involves diagnosing power issues, sensor malfunctions, and mechanical wear to restore proper operation. This guide covers safety precautions, common problems like power failures and sensor obstructions, and DIY maintenance tasks such as cleaning, lubrication, and battery replacement—while identifying when professional service is required for electrical work and motor repairs.
- Power supply problems—tripped breakers and disconnected wiring—cause the majority of electric gate failures.
- DIY-safe maintenance includes sensor cleaning, chain tension adjustment, remote programming, and basic lubrication.
- Professional repairs are necessary for motor issues, control board service, and electrical work beyond battery replacement.
- Regular maintenance prevents costly breakdowns and extends gate system lifespan.
- Always disconnect power before performing any physical inspection or adjustment on electric gate systems.
How to Repair Electric Gates: The Ultimate Guide
Electric gates provide both security and convenience for residential and commercial properties. When they malfunction, the disruption affects your daily routine and home security. This guide walks you through the repair process, from safety precautions to troubleshooting steps, helping you restore your gate’s functionality efficiently and safely.
Safety First: Essential Precautions Before Any Repair
Before touching any electric gate component, understand that these systems operate with lethal voltages and moving parts capable of causing serious injury. The U.S. Consumer Product Safety Commission reports hundreds of injuries annually from automated gate incidents, including crush injuries and entrapment hazards.
Lockout/Tagout Procedures
Always disconnect power at the circuit breaker before beginning any repair work. This is non-negotiable. Locate your gate operator’s dedicated circuit and switch it off completely. Then, install a lockout device to prevent accidental power restoration while you work. Place a visible tag on the disconnect switch indicating that repair work is in progress.
Personal Protective Equipment
Wear safety glasses, work gloves, and closed-toe shoes. For any work involving the electrical panel or wiring, add voltage-rated gloves to your equipment list. Keep a fire extinguisher accessible when working near electrical components.
When to Hire a Licensed Professional
Electrical work beyond basic troubleshooting—including wiring repairs, control board service, and motor rebuilds—should be performed by licensed electricians or certified gate technicians. If your gate uses high-voltage motors (typically over 24 volts), professional service is strongly recommended. Attempting complex electrical repairs without proper training risks electrocution and may void your manufacturer’s warranty.
Common Electric Gate Problems and Symptoms
Understanding what typically goes wrong helps you diagnose issues faster. Electric gate failures usually fall into several distinct categories.
Power-Related Issues
The gate refuses to respond entirely, or operates intermittently. This often stems from tripped breakers, blown fuses, disconnected wiring, or transformer failures. Check your main panel first, then examine the gate’s power supply unit.
Mechanical Failures
Gate makes grinding or squeaking sounds during operation, moves slower than normal, or stops mid-cycle. These symptoms indicate problems with motors, gears, chains, belts, hinges, or worn gate wheels on slide gates. Physical obstructions in the gate’s path also trigger these symptoms.
Sensor and Control Problems
The gate reverses direction unexpectedly, won’t close completely, or ignores remote commands. Safety sensors (photocells) may be misaligned, dirty, or malfunctioning. Remote controls fail due to dead batteries, signal interference, or receiver problems. Error codes displayed on the control panel provide specific diagnostic information—consult your owner’s manual for code meanings.
Suggested read: Electric Gate Repair: Troubleshooting & Solutions Guide
Control Board Malfunctions
Erratic behavior including random operation, failed response to commands, or simultaneous activation of multiple functions points to control board issues. These symptoms may worsen in humid weather or after power surges.
DIY Troubleshooting: Step-by-Step Diagnostics
Systematic diagnosis saves time and prevents unnecessary parts replacement. Follow this logical sequence to identify problems.
Step 1: Visual Inspection
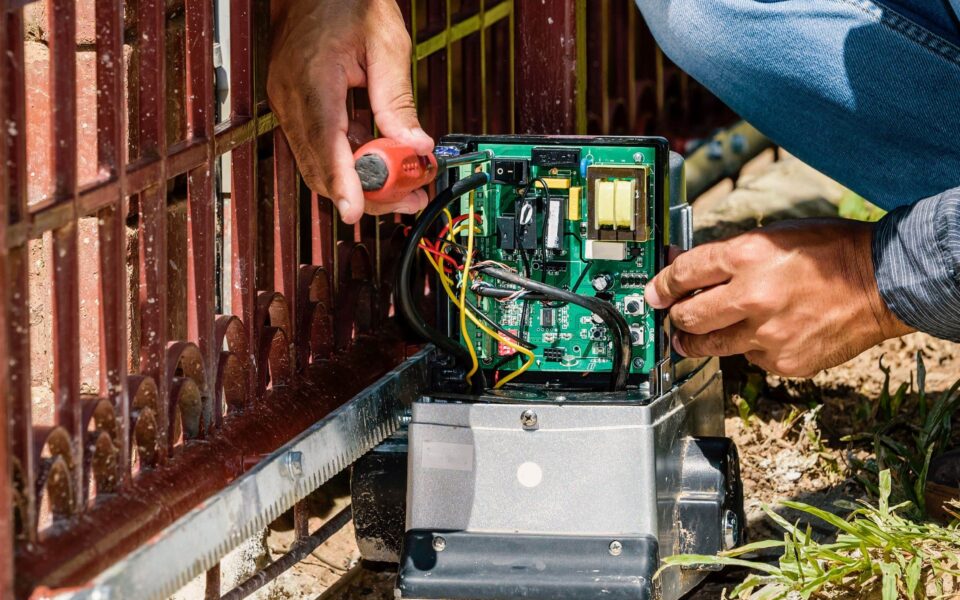
With power disconnected, examine the entire gate system. Look for obvious issues: loose wires, corrosion on terminals, damaged cables or chains, bent tracks, debris accumulation, and physical obstructions. Check that all mounting brackets remain secure and the gate itself hasn’t shifted from its frame.
Step 2: Power Verification
Restore power and test basic operation. Use a voltage tester to confirm electricity reaches the control board. Many gate operators have indicator lights—consult your manual to interpret their meaning. A dark control board with no lights suggests a power supply problem upstream from the operator.
Step 3: Test Safety Features
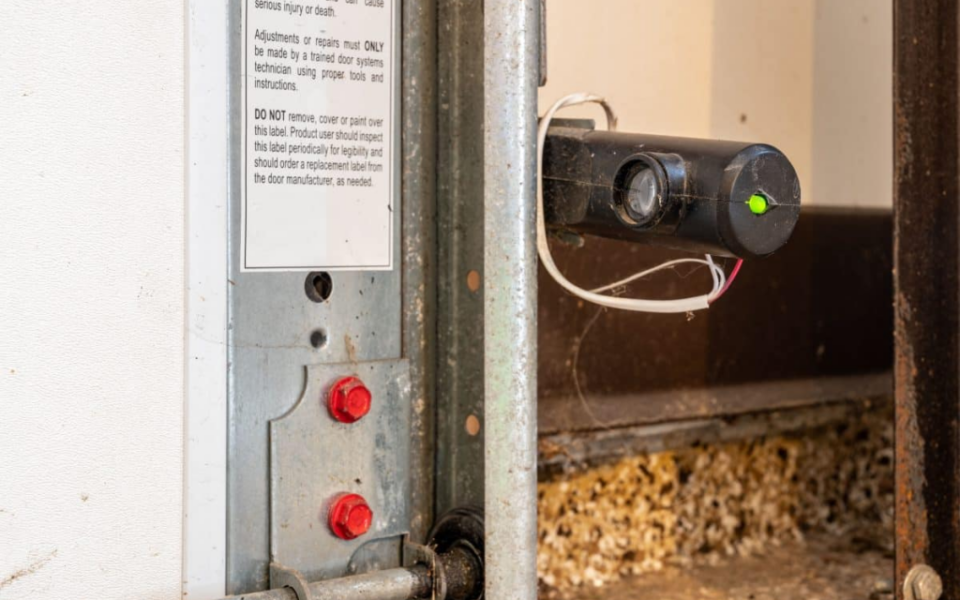
Wave an object in front of each safety sensor while the gate closes. A properly functioning system reverses immediately. If the gate ignores the test object, clean the sensor lenses first. Persistent failure indicates sensor replacement is needed.
Step 4: Remote and Access Control Testing
Replace remote batteries with fresh ones, then test at varying distances. If multiple remotes fail, the problem likely lies with the receiver. Keypad and intercom systems require separate testing procedures detailed in their respective manuals.
Basic Repairs You Can Handle
Several common issues have straightforward solutions requiring minimal tools and no electrical expertise. For more complex issues, consider our guide to choosing the right gate opener when replacement becomes necessary.
Sensor Alignment and Photocell Cleaning
Dust, spider webs, frost, and debris obscure sensor lenses, causing false obstruction readings. Clean both sender and receiver lenses with a soft cloth and glass cleaner. If cleaning doesn’t resolve the issue, loosen the sensor mounting bracket, realign the beams to face each other directly, then tighten securely. Many sensor brackets include adjustment slots for fine-tuning alignment.
Remote Control Battery and Programming
Replace batteries with the correct type (typically CR2032 or A23, depending on your remote model). If the remote still fails after battery replacement, it may need reprogramming to sync with your receiver. Consult your operator manual for the specific programming sequence—most involve entering a learn mode on the control board and pressing the remote button.
Chain and Belt Tension Adjustment
For chain-driven slide gates, check that the drive chain isn’t sagging more than half an inch between pulleys. Adjust tension using the chain tensioner bolt located near the drive sprocket. Belt-driven operators typically include a tension adjustment mechanism—refer to your manual for proper specifications. Over-tightened chains strain the motor; loose chains jump the sprocket.
Lubrication
Apply silicone-based lubricant to gate hinges, wheel axles, chain links, and any moving pivot points. Avoid heavy grease, which attracts dirt and creates buildup. Lubricate every three months for standard use, monthly for high-traffic gates.
Suggested read: The Ultimate Walk-In Cooler Repair Guide: Troubleshooting, Costs, and When to Call a Pro
When to Call a Professional: Red Flags and Cost Considerations
Knowing your limits protects both your safety and your wallet. Certain repairs absolutely require professional expertise.
Warning Signs Requiring Professional Service
- Burning smells from the motor or control board
- Visible damage to wiring or circuit boards
- Gate operator shaking or vibrating excessively
- Intermittent operation that worsens with use
- Gate falling or leaning significantly
- Any work requiring high-voltage electrical connections
- Motor replacement or rebuild
- Control board replacement
- Structural repairs to the gate frame or posts
Cost Expectations
Professional service calls typically range from $75 to $200 depending on your location and contractor. Common repairs cost between $150 and $500 total. Control board replacement often runs $300 to $600 including parts and labor. Motor replacement represents the most significant expense, frequently ranging from $400 to $1,500 depending on your gate’s size and operator type. Always obtain at least three written estimates before authorizing major repairs.
Preventive Maintenance Schedule
Regular maintenance prevents most common failures and extends your gate system’s lifespan by five to ten years.
Monthly Tasks
- Visual inspection of all components
- Clean sensor lenses
- Remove debris from gate tracks and operator mechanism
- Test safety reversal on both sides
- Check remote operation
Quarterly Tasks
- Lubricate all moving parts
- Check and adjust chain or belt tension
- Inspect wiring for damage or corrosion
- Test battery backup systems (if equipped)
- Clean gate hinges and wheel assemblies
Annual Professional Service
Schedule annual inspection with a certified technician. Professional service includes torque checks on all fasteners, electrical testing, motor performance analysis, and identification of worn components before they fail. Many manufacturers require documented professional maintenance to maintain warranty coverage.
Frequently Asked Questions
What are the most common causes of electric gate malfunctions?
Power supply issues account for the majority of failures, including tripped breakers and disconnected wiring. Sensor obstructions from dirt, debris, or frost cause unexpected reversals. Worn mechanical components like chains, belts, and hinges create operational problems. Remote control failures typically result from dead batteries or receiver issues. Control board failures often follow power surges or water damage.
Can I repair my electric gate myself?
Basic maintenance like sensor cleaning, battery replacement, remote programming, chain tension adjustment, and lubrication are appropriate for DIY repair. However, any electrical work beyond battery replacement, motor repairs, control board service, and structural fixes require licensed professionals. When in doubt, consult a certified technician.
How much does professional electric gate repair cost?
Service calls typically range from $75 to $200. Most repairs cost between $150 and $500, covering common issues like sensor replacement, limit switch adjustment, and minor electrical repairs. Major repairs including control board or motor replacement run $300 to $1,500 or more depending on your system.
What safety standards govern automated gates?
UL 325 establishes the primary safety requirements for automated gate operators in the United States. This standard covers installation requirements, safety features, entrapment protection, and operational limits. Professional installers must comply with these standards, which is one reason why professional installation and service is strongly recommended.
How often should I maintain my electric gate?
Perform visual inspections monthly and complete cleaning and lubrication quarterly. Schedule professional annual service for comprehensive testing and adjustment. Gates receiving heavy daily use may require more frequent attention, particularly in harsh weather environments.
Sources & References
- U.S. Consumer Product Safety Commission – Automated Gate Safety Statistics
- UL Standards – UL 325: Standard for Safety for Door, Drapery, Gate, Louver, and Window Operators
- National Electrical Manufacturers Association (NEMA) – Gate Operator Guidelines
- Consumer Product Safety Commission – Automated Vehicular Gate Operator Safety Information
Conclusion
Repair of electric gates requires balancing practical troubleshooting with safety awareness. Start with basic diagnostics—verify power, check for obstructions, and test safety features. Handle straightforward repairs like sensor cleaning, lubrication, and battery replacement yourself. Recognize the warning signs that indicate professional service is necessary: burning smells, control board issues, motor problems, and any high-voltage electrical work.
Your gate’s longevity depends on consistent preventive maintenance. Clean sensors monthly, lubricate moving parts quarterly, and invest in annual professional inspections. These practices prevent most failures and catch developing problems before they become expensive repairs.
Suggested read: garage door repair chicopee: Ultimate Guide to Garage Door Repair
When repair costs approach replacement value, or when your gate shows significant structural wear, discuss full system replacement with a qualified contractor. Modern gate operators offer improved efficiency, better safety features, and smart home integration that may justify the investment.
Safety remains the priority throughout any repair project. If a procedure feels beyond your skill level, stop and call a professional. The cost of professional service pales in comparison to the consequences of electrical injury or system damage from improper repairs.
For a related perspective, see our preventative maintenance schedule.
Sources & References
- Source: UL 325 Standard – Standard for Safety for Door, Drapery, Gate, Louver, and Window Operators (official)
UL 325 is the primary safety standard governing electric gate operators in North America. It establishes requirements for entrapment protection, auto-reverse mechanisms, and safety sensor specifications referenced in the article. [verified topical overlap: electric, gate] [source_origin: project_reuse] - Source: OSHA Electrical Safety Guidelines for Workplace Equipment (documentation)
Federal safety guidelines supporting the article's recommendation to disconnect power before physical inspection or adjustment of electric gate systems. [verified topical overlap: electric]